

How to score a buck starts here: avoid 4 common mistakes that ruin your 150 claim. Get clear steps, pro tips, and an accurate tally—read now to score right.
The Thrill Behind The Number And Why It Matters
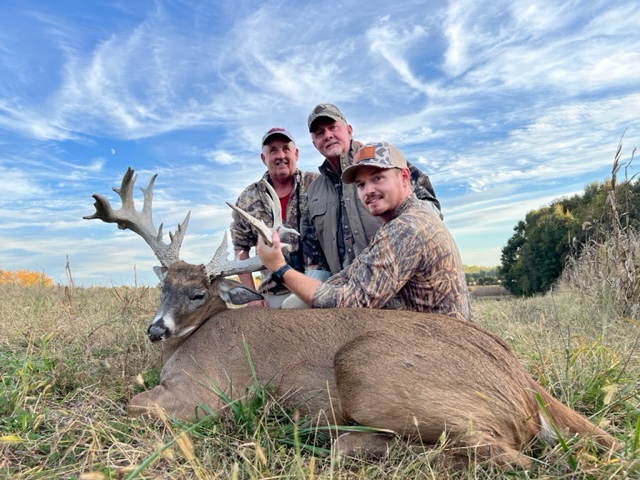
A great rack tells a story. It is late light bending through cedars, frosty breath hanging in the air, and a heartbeat that will not settle. After the shot and the celebration, there is one question hunters love to answer: what does he score. Learning how to score a buck the right way gives you a true record of the hunt, lets you compare deer across seasons, and keeps your claims accurate around the campfire and online. At Cedar Ridge Whitetails in southern Illinois, we see the impact a number can have on a memory. It is not just inches. It is proof of a journey through pine shadows, thick draws, and food plots where a giant finally stepped into view.
What A 150-Class Whitetail Looks Like
Every rack is different, but a 150-class typical whitetail often shows a sweeping frame with tall G2s and G3s, solid mass all the way to the tips, and an inside spread that feels just right to the eye. Think clean symmetry, long main beams that arc forward, and brow tines with presence. If you are hunting at Cedar Ridge Whitetails, your guide will talk you through judging a rack on the hoof so you can size up mass, tine length, and spread before your shot. Still, a number does not become real until you measure it. That is why knowing how to score a buck matters as much as field judging. When you add inches the right way, your 150 is legitimate and stands up to any challenge.
Tools You Need Before You Measure
- Flexible steel measuring tape that reads in 1/8 inch increments
- Small cable or bendable tape to follow curves on beams
- Sharp pencil or fine-tip marker to mark baseline points
- Ruler or straightedge for setting baselines on tines
- Score sheet modeled on Boone and Crockett or Pope and Young
- Masking tape or flags to label left and right sides
- Soft cloth to wipe antlers so debris does not throw off measurements
- Calculator for quick totals and difference deductions
How To Score A Buck The Right Way: Step-By-Step
- Tag, photograph, and set up in good light. Stability matters. Lay the rack on a flat table or tailgate. Wipe mud and debris from antlers. Label the left and right side with tape so your notes never get mixed.
- Study the frame. Decide if the rack is typical or non-typical. A typical frame has its points growing upward from the top of the main beams in a clean pattern. Kickers, drops, and forks count as abnormal points. This choice affects deductions or additions later.
- Measure the inside spread of the main beams. Find the widest inside point between the main beams. Keep the tape at a right angle to the skull plate and measure inside edge to inside edge. Record that number as spread credit. Some official systems cap spread credit relative to the longer main beam length. When in doubt, check the current official score sheet or ask a certified scorer.
- Measure main beam lengths. Hook your tape at the center of the burr where the main beam begins. Run the flexible tape along the outer curve of the main beam, staying on the center of the beam surface, all the way to the very tip. Record a length for each side. This is one of the biggest parts of a total score, so be precise and keep your tape straight along the curve.
- Measure each normal point on the beam. On a typical whitetail, points that grow from the top of the main beam are labeled G1 for brow tines, then G2, G3, G4, and so on as you move out the beam. Set your baseline at the lowest spot where the tine meets the top of the beam. Put zero there, then measure straight up the center of the tine to the tip. Record each tine length on both sides.
- Measure mass with four circumferences per side. You need H1, H2, H3, and H4 on each antler. H1 is the smallest circumference between the burr and the G1. H2 is the smallest between G1 and G2. H3 is the smallest between G2 and G3. H4 is the smallest between G3 and G4. If there is no G4, take H4 at the midpoint between the top of G3 and the beam tip. Record each number carefully.
- Record abnormal points. Any tine that does not grow up from the top of the main beam in the normal pattern is abnormal. Measure from its base on the beam to its tip, just like other tines. On a typical scoring sheet, abnormal inches become deductions. On a non-typical sheet, they are added later. Choose the correct path and stick to it.
- Do the math. Add each side’s main beam length, normal point lengths, and circumferences. Add spread credit to the total. If you are scoring typical, find the differences between the left and right for beam length, each matching point, and each circumference. Sum those differences and subtract them from the gross total. Subtract total abnormal inches. The result is a net typical score. For non-typical, you add abnormal inches after symmetry deductions, following the official sheet.
- Check your work. Re-run each measurement. Tapes slip. Writing smudges. A quick re-check is the easiest way to protect your score and your reputation.
4 Mistakes That Ruin Your 150 Claim
Mistake 1: Measuring The Wrong Spread
Many hunters grab the widest outside point and call it good. That is not how to score a buck. You need the greatest inside spread of the main beams, measured at a right angle to the skull plate and taken from the inside edge of one beam to the inside edge of the other. If you chase the tips for the look of width, your number will be inflated and easy to challenge. Some scoring systems also limit spread credit to the length of the longer main beam. That detail trips up a lot of folks. If your inside spread is massive but past beam length, your credit can be restricted by the rules. When you hunt and measure at Cedar Ridge Whitetails, we coach you through this step so your spread is both big and bulletproof.
- Quick check: Is your tape inside edge to inside edge at the widest true interior spot
- Quick check: Is the tape square to the skull plate, not angled forward
- Quick check: Did you confirm whether your chosen system limits spread credit
Mistake 2: Starting Tine Measurements From The Wrong Baseline
If you measure a G2 from the side of the beam or from the burr, you add phantom inches. Every normal point must be measured from the top of the main beam at the lowest spot where the tine meets the beam. Place zero there. Follow the center of the tine to the tip. Do not angle the tape. Do not start from the bark line on the side. That mistake alone can turn a high 140 into a questionable 150. Guides at Cedar Ridge Whitetails teach guests to mark a tiny line at the true base of each tine before measuring. That little mark keeps every point honest.
- Quick check: Mark each tine’s lowest contact point on the beam top before you measure
- Quick check: Keep your tape centered on the tine, not drifting to an edge
- Quick check: Re-measure tines with a straightedge helping you set the baseline
Mistake 3: Putting Mass Measurements In The Wrong Places
Circumference adds up. Four measurements on each beam can push a buck into a new class. Hunters often take H4 in the wrong zone or skip it on an 8-point. The rule is simple. H1 is the smallest point of circumference between the burr and G1. H2 is the smallest between G1 and G2. H3 is the smallest between G2 and G3. H4 is the smallest between G3 and G4. If there is no G4, take H4 halfway between the top of G3 and the beam tip. Do not guess. Chase the smallest spot in each zone, not the biggest. If you pick a fat section, you overstate the score. At Cedar Ridge Whitetails, many of our mature bucks carry heavy mass through the beams, so doing this right protects a very honest and exciting number.
- Quick check: Confirm each H measurement is the smallest in its correct zone
- Quick check: On an 8-point, place H4 halfway from G3 to the beam tip
- Quick check: Use a cable or soft wire to fit tight curves, then read the tape
Mistake 4: Mislabeling Abnormal Points And Botching Deductions
Abnormal points do not count as normal tines on a typical frame. If a kicker grows off the side of a beam or a fork splits a point, you must treat those inches as abnormal. On a typical score, abnormal inches come off the gross. On a non-typical score, you add them after symmetry deductions. The tricky part is deciding whether to enter a buck as typical or non-typical. With a clean frame, most hunters go typical. With a few wild extras, non-typical may make sense. What hurts a 150 claim is mixing systems or counting a kicker as a clean G4. If you are on the fence, ask a certified scorer or one of the seasoned guides at Cedar Ridge Whitetails for advice. We want your number to be rock solid when you show that rack to your buddies.
- Quick check: Flag every non-normal point with tape as “abnormal” before you measure
- Quick check: Choose typical or non-typical and stick to that sheet’s rules
- Quick check: Keep a separate total for abnormal inches so the math is clean
Pro Tips To Nail Accuracy The First Time
- Use 1/8 inch increments. The official sheets round to the nearest eighth. Write 10 4/8, not 10.5. Consistent format avoids confusion later.
- Green vs dry score. Antlers shrink as they dry. Many systems require a 60-day drying period before an official entry. Note the date you measured and label it green if you score early.
- Photograph baselines. Snap a quick photo of each tine’s base and your tape position. If someone questions a number, you can show your setup.
- Measure twice. Run every line a second time after a short break. Most errors vanish when you slow down.
- Keep left and right separate. Put an L or R next to every line on your sheet and on the antler with tape flags. Mixing sides wrecks symmetry math.
- Know when to call a pro. If a buck looks like a book candidate, a certified scorer is worth it. Cedar Ridge Whitetails can connect you with trusted scorers who know the latest rules.
- Check for beam tip wear. If a tip is blunted, follow the curve to the true end, not the worn flat. A cable helps you find the right path.
- Stay level. When you measure spread or lay a straightedge for baselines, keep the rack level. A tilt can add or subtract hidden fractions.
Quick FAQ: Net, Gross, Typical, And Non-Typical
What is gross score. Gross is the total of spread credit, both main beams, all normal points, and all mass measurements before you handle symmetry differences or abnormal inches. It is the big number many hunters quote first. What is net score. Net reflects deductions for side-to-side differences and abnormal inches on a typical sheet. It is the number that compares clean frame to clean frame. For non-typical, you handle symmetry deductions, then add abnormal inches. What counts as a typical frame. Normal points that rise off the top of the main beam in order. G1 is a brow tine, then G2, G3, G4, and so on. Abnormal points come off the side or in odd places. Which should I use. If the rack is clean with minor extras, typical often makes sense. If extras define the rack, non-typical can honor that character. When you hunt with Cedar Ridge Whitetails, we help you decide the best path so your score matches the buck’s true look.
Why Hunters Choose Cedar Ridge Whitetails
Cedar Ridge Whitetails is a family-owned hunting preserve in scenic southern Illinois. Our private reserve blends mature timber, pine and cedar thickets, thick draws, cornfields, and rich food plots. That mix grows mass, tine length, and spreads that excite even seasoned hunters. Every hunt is private to your group, so your guide is focused on your style, your goals, and your pace. We offer defined trophy classes so you can target the caliber of deer you are after. Book a 170 to 179 inch hunt if you crave a classic giant. Step up to 180 to 199 inches if you want a true monarch. Or chase history with 200 inches and above. At the end of a long sit, our on-site lodging is a welcome sight. Warm meals, a clean bed, and a place to tell your story are part of the Cedar Ridge Whitetails experience.
Book A Guided Hunt That Ends With A Real Score
If you are serious about how to score a buck and you want a rack that backs up your claim, come hunt southern Illinois with Cedar Ridge Whitetails. We blend habitat management, smart food plots, and low pressure to give deer time to grow. Your guide will help you judge from the stand, recover with care, and measure with honesty back at camp. The notebook fills with real numbers. The smile says it all. Whether you are after a clean 8 with monster G2s or a gnarly non-typical with character for days, we will tailor your hunt and make the most of your time in the woods.
Field Judging Versus Taping: Bridging The Gap
Most hunters learn to judge by eye long before they learn how to score a buck with a tape. In the field, focus on four fast cues. Spread that reaches ear tips or better. Main beams that sweep past the nose in profile. G2 and G3 lengths that look taller than the ear. Mass that stays heavy into the tips. Back at camp, let the tape confirm what your eyes saw. The more you score, the better your field estimates become. At Cedar Ridge Whitetails, our guides spend countless hours glassing edges and watching food plots. We love passing those instincts on to you.
Common Scoring Scenarios You Will Face
The Tall 8 With No G4s
This buck may carry two long beams and sky-high G2s and G3s, but no G4s. Mass and beam length do the heavy lifting. Be sure to take H4 in the right place halfway from G3 to the beam tip. Many hunters forget that and lose honest inches they earned.
The Wide 10 That Looks Bigger Than It Is
Width wins attention, but the tape tells the truth. Inside spread is what counts. Do not let tip-to-tip or outside spread sway you. Focus on beam length and tine measurements. If the beams are short, the total can fall shy of 150 even with great width.
The Character Buck With Kickers
Abnormal points are fun to look at and tough to score. They can hurt a typical net but sing on a non-typical entry. Measure every abnormal point, then decide which score sheet tells the truest story. When in doubt, call a pro scorer. Cedar Ridge Whitetails can help.
Final Thoughts: How To Score A Buck With Confidence
Great hunts deserve honest numbers. When you know how to score a buck the right way, you protect your story and your reputation. Use the right tools. Follow a clean process. Avoid the four big mistakes that ruin a 150 claim. Measure the correct inside spread. Start every tine at the true baseline on the top of the beam. Place mass measurements in the correct zones. Handle abnormal points and deductions with care. Do those things, and your number will stand up in any lodge or on any wall. If you are ready to turn knowledge into inches you can prove, hunt with Cedar Ridge Whitetails in southern Illinois. Our guided, private hunts target 170 to 179 inches, 180 to 199 inches, and 200 inches and above. The habitat is wild and varied. The lodging is close and comfortable. The memories you make will last. Most of all, when that buck of a lifetime steps out in the pines and your heart starts to pound, you will know what you are looking at and exactly how to score it when the work is done.
Leave A Comment